
In July of 2017, I stumbled upon this video by Ryan Nelwan, where he showcases his custom-made touchscreen smart mirror. It immediately inspired me to make my own smart mirror based on the MagicMirror² platform. This post documents my journey through the process and serves as a guide to help you make your own smart mirror.

Ryan Nelwan’s Touchscreen “PANL” Mirror
Source
The Parts
- A Raspberry Pi 3 B+ or 4 (with power supply)
- 8GB+ SD Card & an HDMI Cable, Keyboard, and Mouse
- A two-way mirror (two-way acrylic will also work)
- A monitor/TV (with wall mount)
- A Mini USB Mic
- USB Extension Cable

I recommend the Raspberry Pi 3B+ or 4 based on their power and ease of use when installing node dependencies and the MagicMirror² platform. Feel free to use an older Raspberry Pi or the Pi Zero, but expect additional challenges.
Unquestionably, the hardest item to find for building a MagicMirror is a two-way mirror itself. These mirrors work by being reflective (like a normal mirror) on one side and transparent on the other. “The half-silvered surface will reflect about half the light that strikes its surface while letting the other half go straight through.”¹ I was able to find a large two-way mirror on Kijiji for about $50, and then had it polished and cut at a glass and mirror shop for an additional $20.
The USB microphone and extension cable will come in handy later when we install Google Assistant. This step is optional, of course, but well worth the effort.
1. Setup Your Raspberry Pi with the Raspbian OS
If this is your first time working with a Raspberry Pi, I recommend buying a kit that comes with almost everything ready to go. Otherwise, follow this tutorial to set up the NOOBS (New Out Of Box Software) OS, from which you can select Raspbian to install. Note: Make sure to install the full version of Raspbian, not Raspbian Lite.
2. Enable SSH on Your Raspberry Pi
I should note that this step is optional, but if you're like me and find working in Raspbian tedious, enabling SSH will make your life a lot easier. See the steps here to enable SSH and connect to your primary computer.
3. Use the One-Line Bash Command
Using the Raspberry Pi terminal or through SSH, run the following bash command to go through the full installation:
bash -c "$(curl -sL https://raw.githubusercontent.com/MichMich/MagicMirror/master/installers/raspberry.sh)"Alternatively, if you choose to manually install MagicMirror² follow the README on Github repo page making sure you have installed Node.js and all necessary dependencies.
4. Starting Your MagicMirror
This assumes you have no prior knowledge working with command line shell. If you know how to npm start a project, you can skip this step. Otherwise, follow along.
In the terminal, navigate to your MagicMirror (cd MagicMirror) directory and start (npm start). If at this point, you see a screen that asks you to create a config file, you have done everything correctly so far.
Note: cd just means to change the directory, so if my MagicMirror folder was in Documents > Github > MagicMirror, then I would type cd Documents/Github/MagicMirror to navigate to it. npm stands for node package manager, and it's the package manager used for Node.js. In our case, npm is used to install dependencies for our MagicMirror (if you didn't use the one-line command from above, you would need to npm install before npm start).

5. Setting Up Your config.js File
Navigate to this directory (/home/pi/MagicMirror/config) and copy the contents of the config.js.sample file to create a new config.js file in the same directory. Depending on your settings, there may be some minor modifications that need to be made to your config file. At this point, your MagicMirror² is complete (sort of) and can be run in the same way we did so in step 4.
6. Customizing Your Mirror
The beauty of the MagicMirror community is all the different add-ons, called modules, that you can install on your mirror. See the list of 3rd party modules and install what works best for you.
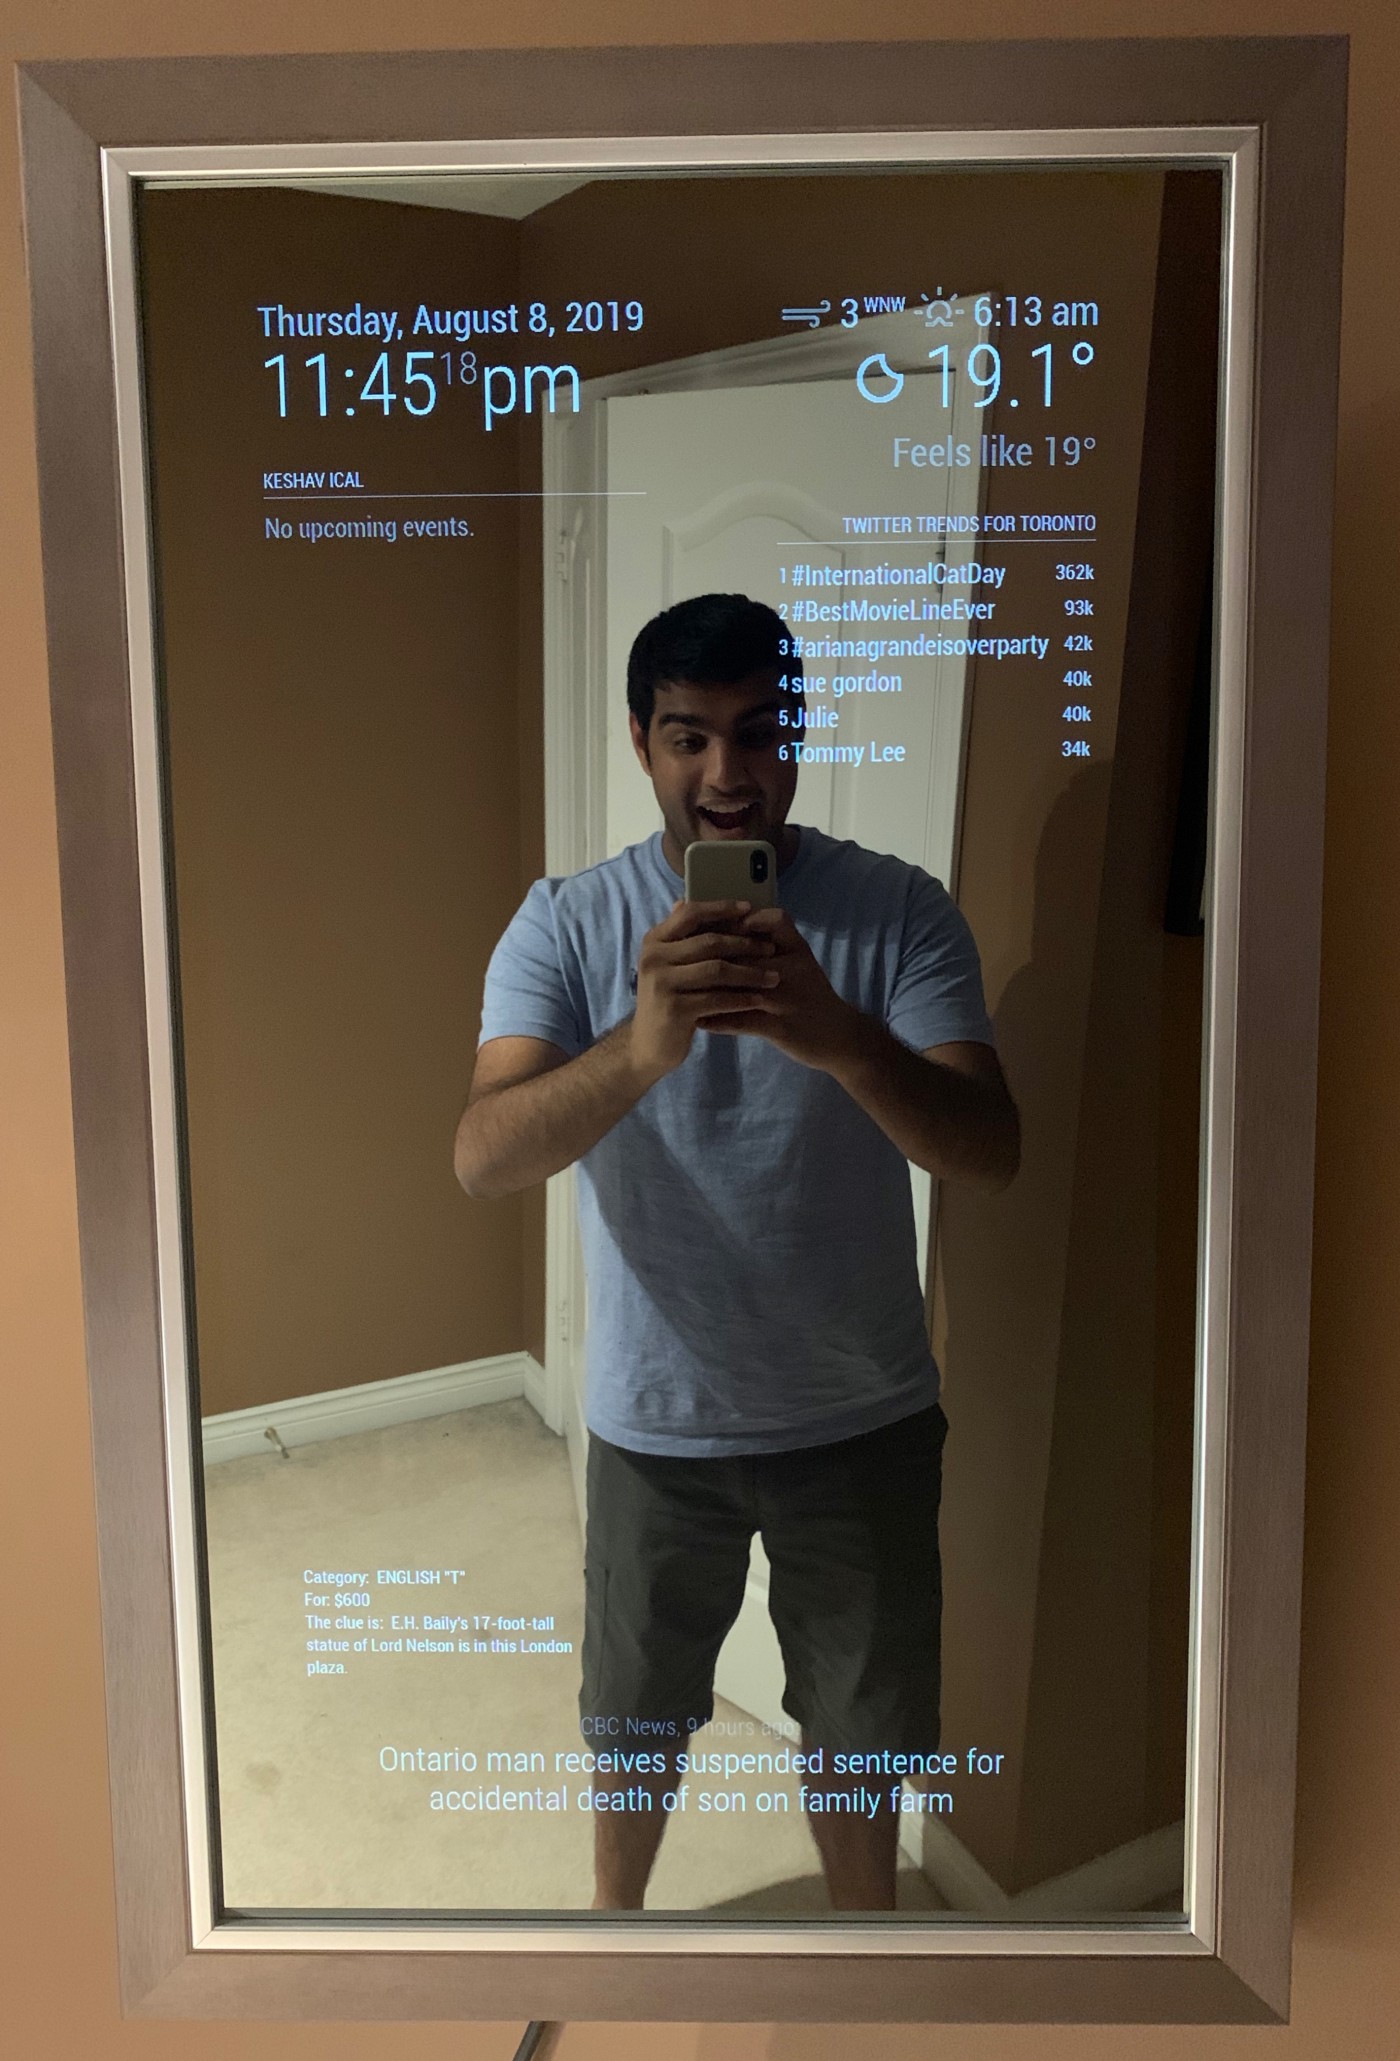
Here is the list of modules I have installed:
- Clock
- Calendar (synced to my Google Calendar and iCal in real-time)
- Current Weather
- Weather Forecast
- News Feed (CBC News RSS feed)
- Compliments
- Hello World
- Alert
- MMM-NowPlayingOnSpotify (displays the current song playing on Spotify in real-time)
- MMM-GoogleAssistant (turns my mirror into a Google Assistant)
- MMM-JEOPARDY (cycles through 40 years of Jeopardy questions)
- MMM-TwitterTrendsByPlace (shows the top trending Twitter hashtags in Toronto)
If you want to save yourself some time when including each of these modules in your config file, you can copy and paste my Config file. Of course, you will still have to install each module and paste the corresponding API keys if applicable.
Have Fun Building Your Mirror!
If you encounter technical issues or face difficulty, head on over to the MagicMirror Forums.
[1]: “How do one-way mirrors work?” 12 July 2000. HowStuffWorks.com. retrieved 27 July 2019